How to Install Private Internet Access VPN on Bluefin Linux OS
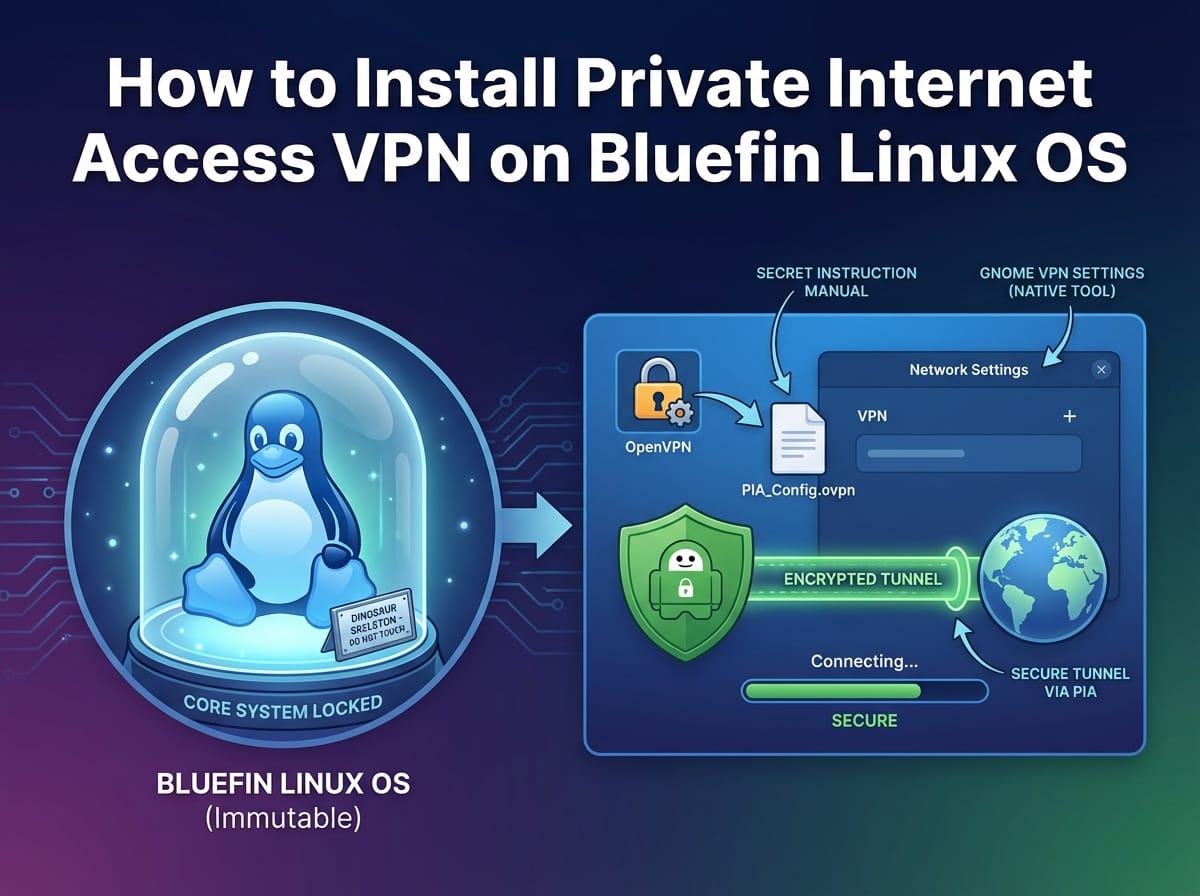
Setting up a Virtual Private Network (VPN) on a standard Linux distribution is usually as simple as downloading an app. However, if you are using Bluefin Linux OS, you are dealing with a next-generation, immutable operating system. This means standard installation methods might not work or could break your system. Fortunately, integrating Private Internet Access (PIA) into Bluefin is fast, highly secure, and incredibly stable when you use the PIA OpenVPN (OVPN) generator and the native GNOME VPN settings configuration tool.
In this guide, we will walk you through exactly how to generate your secure configuration files and easily import them directly into your Bluefin OS.
Understanding the Basics: Bluefin OS and OpenVPN
ELI5: What is an Immutable OS like Bluefin?
Explain Like I’m 5: Imagine your computer’s core system files are a beautiful dinosaur skeleton in a museum. It’s placed behind thick, unbreakable glass. You can look at it, study it, and use the museum, but you cannot touch or alter the bones. That is an immutable OS. It locks down the core system so that viruses, malware, or accidental bad commands cannot break your computer. Because the system is “behind glass,” we can’t install a traditional VPN software package. Instead, we use the tools already sitting outside the glass—in this case, the built-in GNOME Network Manager.
ELI5: What is an OVPN File?
Explain Like I’m 5: An .ovpn file is basically a secret instruction manual. When you hand this manual to your computer, it tells your system exactly which secure tunnel to build, what secret passwords to use, and exactly where on the internet that secure tunnel should lead to.
Step 1: How to Use the Private Internet Access OVPN Generator
Because we aren’t using a dedicated PIA app, we need to generate those “secret instruction manuals” manually. PIA provides a fantastic tool to create custom OpenVPN configurations that are perfect for Bluefin Linux.
- Visit the Generator: Open your web browser and navigate to the official PIA OpenVPN Config Generator (requires logging into your PIA account).
- Select the Platform: In the generator, choose Linux. This ensures the configuration is optimized for the GNOME Network Manager.
- Pick a Region: Choose the server location you want to connect to. Example: If you want to bypass geo-restrictions to watch BBC iPlayer, you would select a UK-based server like “UK London”.
- Choose Your Protocol (UDP vs TCP): You will be asked to pick between UDP or TCP.
- ELI5 UDP (Recommended for speed): UDP is like a fast delivery truck zipping down the highway. It doesn’t care if one or two packages fall out the back; its only goal is to get there as fast as possible. Great for streaming and gaming!
- ELI5 TCP (Recommended for stability): TCP is like a certified mail carrier. They walk slower, but they check every single package and require a signature. If you are on a very spotty public Wi-Fi network and keep losing connection, choose TCP.
- Download: Click generate, and download the resulting
.ovpnzip file. Extract this zip file into your Downloads folder so the individual files are ready to use.
Method 1: Using Network Manager (Recommended)
This method keeps your system secure and avoids installation errors on immutable systems like Bluefin OS. By using the built-in GNOME tool, you rely on software that has already been tested and integrated perfectly with your desktop environment.
Step-by-Step Installation via GNOME VPN Settings
- Open GNOME Settings: Click on your system tray in the top right corner of your Bluefin desktop and select the gear icon to open Settings.
- Navigate to Network: On the left-hand sidebar, click on Network.
- Add a New VPN: Look for the VPN section and click the + (plus) button next to it.
- Import to Bluefin: A new window will pop up asking what type of VPN you want to set up. Scroll down to the very bottom and select Import from file…
- Select Your Config: A file browser will open. Navigate to the folder where you extracted your PIA files earlier and choose one of the
.ovpnfiles you downloaded (e.g.,uk_london.ovpn). - Enter Credentials: A configuration window will appear. The server addresses are already filled in for you! Just look for the Username and Password fields. Enter your standard PIA username (usually an ID starting with ‘p’) and your PIA password.
- Save and Add: Click the Add button in the top right corner of the window.
How to Connect and Disconnect
Now that your VPN is configured inside the GNOME Network Manager, connecting is a breeze:
- Connect: Toggle the VPN connection ON in the Network settings, or simply click your top-right system tray, click on your newly named VPN connection, and select Connect. A small padlock icon will appear at the top of your screen confirming your traffic is secure.
- Disconnect: Simply click the same toggle to turn it OFF.
Troubleshooting Common Connection Issues
Even with the most streamlined setup, you might run into minor hiccups. Here is how to fix them:
Authentication Failed
If your VPN refuses to connect and throws an authentication error, double-check your PIA username and password. Remember, PIA sometimes uses separate “x-credentials” for different router/manual setups depending on your account age, but standard OpenVPN generators usually accept your main ‘p-number’ login.
VPN Hangs on Connecting
If the connection spinner keeps going forever, your local network firewall might be blocking the port. Go back to the PIA OpenVPN Generator, generate a new .ovpn file using TCP instead of UDP, and import the new file. TCP is much better at sneaking through strict firewalls (like at a coffee shop or hotel).
Conclusion
Using the Private Internet Access OVPN generator alongside Bluefin Linux’s GNOME VPN settings configuration tool is the absolute best way to ensure your privacy. By avoiding third-party apps, you respect the immutable nature of Bluefin OS, keeping your “museum glass” intact while securing your internet traffic from prying eyes.