When an external hard drive starts clicking, freezing, or simply refuses to show up in Windows Explorer, the immediate reaction is usually panic. However, just because Windows cannot read the drive doesn’t mean your data is gone. Windows is notoriously sensitive to drive errors; if it encounters a bad sector, it often gives up entirely to protect the system.
To recover your data, we need an operating system that is more robust and gives us direct control over the hardware. Enter SystemRescue (formerly SystemRescueCd). This is a Linux-based toolkit designed specifically for repairing systems and rescuing data.
In this guide, we will walk through the exact steps to create a rescue USB, identify your drives using command-line tools, and use TestDisk to extract specific folders from a failing drive.
Why Use Linux for Data Recovery?
Think of Windows like a strict librarian. If a book has a torn page, the librarian refuses to let you check it out. Linux, specifically tools like SystemRescue, is more like a forensic investigator. It doesn’t care if the book is torn; it will put on gloves and carefully extract whatever text is legible.
You do not need to be a Linux expert to follow this guide, but you will need to type specific commands precisely.
Phase 1: Preparation and Booting
Step 1: Create a Bootable SystemRescue USB
Since your computer cannot read the drive inside your current Windows environment (or if your main OS is failing), you need to boot from a USB stick.
- Download the ISO: Go to system-rescue.org and download the latest ISO image (AMD64 is standard for modern PCs).
- Download Rufus: Get the tool “Rufus” (for Windows) to write the ISO to a USB stick.
- Burn the ISO:
- Plug in an empty USB stick (at least 4GB).
- Open Rufus. Select your USB stick under “Device”.
- Click “Select” and choose the SystemRescue ISO you downloaded.
- Click “Start” and wait for the process to finish.
Step 2: Booting into SystemRescue
- Shut down your computer.
- Plug in the SystemRescue USB.
- Crucial: You also need a place to save the recovered data. Plug in a healthy external drive (or a large USB stick) where you will copy the files to.
- Turn on the computer and tap your Boot Menu key (usually F12, F10, or Del, depending on your manufacturer) until you see a list of boot devices.
- Select the USB drive.
- When the blue menu appears, press Enter on the first option to boot SystemRescue.
Phase 2: Identifying and Mounting Drives
Once the white text stops scrolling, you will be at a command prompt. This is where many users get confused because Linux names drives differently than Windows (no C: or D: drives).
Step 3: Recognize Your Disks with lsblk
We need to figure out which drive is the “Broken” one and which is the “Backup” one. We use the lsblk command.
ELI5: Think of lsblk as a roll call. It asks every storage device connected to the computer to shout out its name and size.
Type the following and press Enter:
lsblkYou will see a list like this:
- sda (1000G) – Likely your internal Windows drive.
- sdb (2000G) – Could be your external failing drive.
- sdc (500G) – Could be your healthy backup drive.
Identify your drives based on their storage size (SIZE column). Write down the names (e.g., /dev/sdb1, /dev/sdc1). Note that sdb is the physical disk, while sdb1 is the partition (the volume where data lives).
Step 4: Check Space with df -h
Another useful command is df -h.
df -hThis stands for “Disk Free – Human Readable.” It shows drives that are already connected (mounted) and how much space is left. If your drives don’t show up here yet, it means they are physically attached but the system hasn’t “opened” them yet.
Step 5: Mounting the Backup Drive
In Linux, you must manually attach a drive to a folder to use it. This process is called mounting.
ELI5: Mounting is like plugging a lamp into a wall socket. Just having the lamp (drive) in the room isn’t enough; you have to plug it into the socket (folder) to get power.
We need to mount the Healthy Backup Drive so we have a place to save the files. Do not mount the failing drive if you can avoid it; we want to stress it as little as possible.
- Create a folder to act as the socket:
mkdir /mnt/backup - Mount your healthy drive (let’s assume your healthy drive is
/dev/sdc1) to that folder:mount /dev/sdc1 /mnt/backup
Now, anything we save to the folder /mnt/backup will actually be saved to your healthy external hard drive.
Phase 3: Recovering Specific Folders
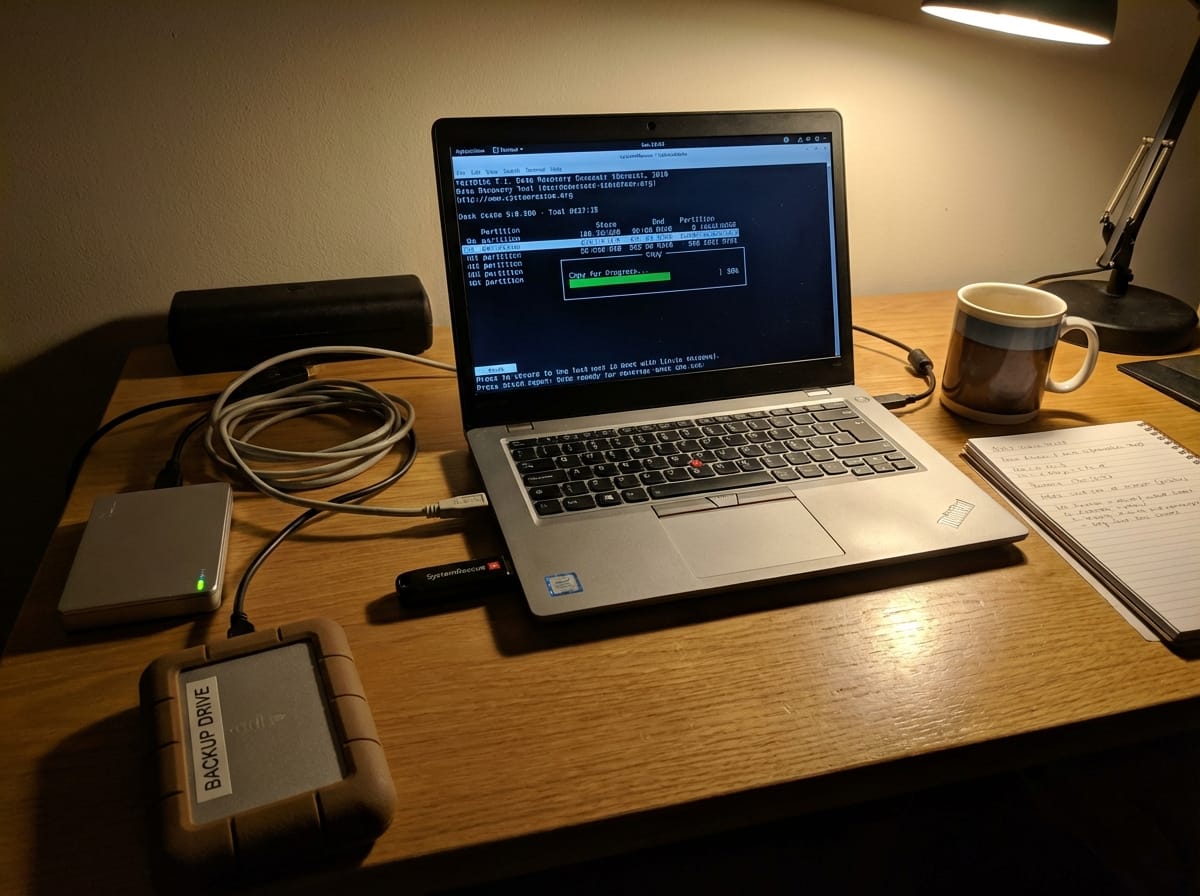
Step 6: Launching TestDisk
We will use TestDisk to read the structure of the failing drive and copy files out.
Type:
testdisk- Log File: Select “Create” to make a new log file.
- Select Media: Use the arrow keys to highlight your Failing Drive (e.g.,
/dev/sdb). Make sure to select “Proceed”. - Partition Table Type: TestDisk usually detects this automatically. For Windows drives, it is usually “Intel” (MBR) or “EFI GPT”. Press Enter on the hint it provides.
- Advanced: Since we want to recover specific files and the partition likely still exists, select [ Advanced ] Filesystem Utils.
Step 7: Browsing and Copying Files
- You will see a list of partitions. Highlight the main data partition and select [ List ] at the bottom.
- You should now see the files inside your failing drive.
- Use Up/Down arrows to highlight folders.
- Press Enter to go inside a folder.
- Press q to go back.
- Navigate to the specific folder you want to save (e.g., “Family Photos”).
- To Copy:
- Highlight the folder or file.
- Press c (lowercase) to copy the current file, or C (uppercase) to copy all selected files.
- Select Destination:
TestDisk will ask where to paste the files. You need to navigate to your mounted backup drive.- Use the arrows to select
..(which means “go up”) and press Enter until you see the root folders. - Look for the folder
mntand press Enter. - Look for
backup(the folder we made earlier) and press Enter. - Press C (uppercase) to confirm the destination.
- Use the arrows to select
TestDisk will now copy the data from the failing drive to your healthy backup drive. When finished, “Copy Done!” will appear in green.
TestDisk vs. PhotoRec: What’s the difference?
You might see an option for PhotoRec. Here is why we used TestDisk instead:
- TestDisk recovers the filesystem. It keeps your filenames (“Thesis_Final.docx”) and your folder structure intact. It is like recovering a book with the Table of Contents included.
- PhotoRec recovers raw data. It ignores the file system and looks for data patterns. It will recover your file, but it will name it
f12345.docxand put it in a random folder. Use PhotoRec only if TestDisk fails to see your files.
Phase 4: Finishing Up
Step 8: Unmounting and Shutdown
Once you have copied your important folders, it is vital to safely disconnect the drives to ensure all data is written completely.
ELI5: Unmounting is the same as “Eject USB” in Windows. If you just pull the plug, you might leave a file halfway written.
Quit TestDisk by pressing q repeatedly until you exit the program. Then, run the unmount command on your backup drive:
umount /mnt/backupIf the command runs without an error message, it is safe to shut down.
poweroffYou can now plug your healthy backup drive into a working Windows computer and access your recovered folders.